To implement multifactor authentication with Google Authenticator, we’ll need the open-source Google Authenticator PAM module. PAM stands for “pluggable authentication module” – it’s a way to easily plug different forms of authentication into a Linux system.
Download the required packages:
# apt-get -yy install gcc mercurial libpam0g-dev
Download from google code and compile it
# wget https://google-authenticator.googlecode.com/files/libpam-google-authenticator-1.0-source.tar.bz2
# bunzip2 libpam-google-authenticator-1.0-source.tar.bz2
# tar -xvf libpam-google-authenticator-1.0-source.tar
# cd libpam-google-authenticator-1.0
# make
# make install
run it for the first time
# ./google-authenticator
Do you want authentication tokens to be time-based (y/n) y
https://www.google.com/chart?chs=200×200&chld=M|0&cht=qr&chl=otpauth://totp/harris@www.example.com%3Fsecret%3D TYJ74KP3JJJBDZBG
Your new secret key is: TYJ74KP3JJJBDZBG
Your verification code is 063115
Your emergency scratch codes are:
16481508
19248644
56538567
36737328
68456914
Do you want me to update your “/root/.google_authenticator” file (y/n) y
Do you want to disallow multiple uses of the same authentication
token? This restricts you to one login about every 30s, but it increases
your chances to notice or even prevent man-in-the-middle attacks (y/n) y
By default, tokens are good for 30 seconds and in order to compensate for
possible time-skew between the client and the server, we allow an extra
token before and after the current time. If you experience problems with poor
time synchronization, you can increase the window from its default
size of 1:30min to about 4min. Do you want to do so (y/n) y
If the computer that you are logging into isn’t hardened against brute-force
login attempts, you can enable rate-limiting for the authentication module.
By default, this limits attackers to no more than 3 login attempts every 30s.
Do you want to enable rate-limiting (y/n) y
Google Authenticator will present you with a secret key and several “emergency scratch codes.” Write down the emergency scratch codes somewhere safe – they can only be used one time each, and they’re intended for use if you lose your phone.
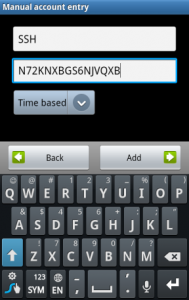
Enter the secret key in the Google Authenticator app on your phone (official apps are available for Android, iOS, and Blackberry. You can also use the scan barcode feature – go to the URL located near the top of the command’s output and you can scan a QR code with your phone’s camera.
You’ll now have a constantly changing verification code on your phone.
Activate google authenticator
Next you’ll have to require Google Authenticator for SSH logins. To do so, open the /etc/pam.d/sshd file on your system (for example, with the sudo nano /etc/pam.d/sshd command) and add the following line to end of the file:
auth required pam_google_authenticator.so
Next, open the /etc/ssh/sshd_config file, locate the ChallengeResponseAuthentication line, and change it to read as follows:
ChallengeResponseAuthentication yes
(If the ChallengeResponseAuthentication line doesn’t already exist, add the above line to the file.)
Finally, restart the SSH server so your changes will take effect:
# service ssh restart
You’ll be prompted for both your password and Google Authenticator code whenever you attempt to log in via SSH.
Just run google-authenticator as the user which you want to enable 2 factor authentication for.
Sometime i wants to know who is login and when user login to my server but i don’t want to setup and run my own mail server, this can be done easily by using tcpwrapper and ssmtp , first make sure ssmtp is installed
# dpkg -l|grep ssmtp
iF ssmtp 2.64-4fakesync1 extremely simple MTA to get mail off the sys
if ssmtp is not installed yet, install it by using
# apt-get install ssmtp
If you are using Gmail account , change the root, authuser, and authpass options to the email address, username, and password of your email account. If you’re using another mail service you’ll need to change mailhub to the relevant SMTP server.
edit /etc/ssmtp/ssmtp.conf and add these lines
--------------------------------------------

root=alert@example.com

mailhub=smtp.example.com:587

rewriteDomain=

hostname=smtp.example.com:587

UseSTARTTLS=YES

UseTLS=YES

AuthUser=alert@example.com

AuthPass=password

AuthMethod=LOGIN

FromLineOverride=YES # optional

--------------------------------------------
Change the ‘From’ text by editing /etc/passwd to receive mail from ‘root@server1.example.com’ instead of just ‘root’.
# chfn -f root@server1.example.com root
edit /etc/ssmtp/revaliases and add this line or add more line for another user
--------------------------------------------

# sSMTP aliases

#

# Format:    local_account:outgoing_address:mailhub

#

# Example: root:your_login@your.domain:mailhub.your.domain[:port]

# where [:port] is an optional port number that defaults to 25.

root:alert@example.com:smtp.example.com:587

--------------------------------------------
to test it
# echo “test send email using ssmtp|mail -s “TEST” alert@example.com
once you are able to receive that test message, proceed to edit /etc/hosts.allow and add these 2 lines, so you will be notified if someone login to your sever
--------------------------------------------

SSHD: ALL: spawn (/bin/echo "SSH connection to %H from %h[%a]" | \

/usr/bin/mail -s "SSH Login Alert [server1.example.com]" alert@example.com)

--------------------------------------------
When a request is made to your server for a page on your site (for instance, when a user accesses your page in a browser or when Googlebot crawls the page), your server returns an HTTP status code in response to the request.
This status code provides information about the status of the request. This status code gives Googlebot information about your site and the requested page.
Some common status codes are:
- 200 – the server successfully returned the page
- 404 – the requested page doesn’t exist
- 503 – the server is temporarily unavailable
A complete list of HTTP status codes is below. You can also visit the W3C page on HTTP status codes for more information.
Source: http://support.google.com/webmasters/bin/answer.py?hl=en&answer=4013
1xx (Provisional response)
Status codes that indicate a provisional response and require the requestor to take action to continue.
100 (Continue) The requestor should continue with the request. The server returns this code to indicate that it has received the first part of a request and is waiting for the rest.
101 (Switching protocols) The requestor has asked the server to switch protocols and the server is acknowledging that it will do so.
2xx (Successful)
Status codes that indicate that the server successfully processed the request.
200 (Successful) The server successfully processed the request. Generally, this means that the server provided the requested page. If you see this status for your robots.txt file, it means that Googlebot retrieved it successfully.
201 (Created) The request was successful and the server created a new resource.
202 (Accepted) The server has accepted the request, but hasn’t yet processed it.
203 (Non-authoritative information) The server successfully processed the request, but is returning information that may be from another source.
204 (No content) The server successfully processed the request, but isn’t returning any content.
205 (Reset content) The server successfully proccessed the request, but isn’t returning any content. Unlike a 204 response, this response requires that the requestor reset the document view (for instance, clear a form for new input).
206 (Partial content) The server successfully processed a partial GET request.
3xx (Redirected)
Further action is needed to fulfill the request. Often, these status codes are used for redirection. Google recommends that you use fewer than five redirects for each request. You can use Webmaster Tools to see if Googlebot is having trouble crawling your redirected pages. The Crawl Errors page under Health lists URLs that Googlebot was unable to crawl due to redirect errors.
300 (Multiple choices) The server has several actions available based on the request. The server may choose an action based on the requestor (user agent) or the server may present a list so the requestor can choose an action.
301 (Moved permanently) The requested page has been permanently moved to a new location.
When the server returns this response (as a response to a GET or HEAD request), it automatically forwards the requestor to the new location. You should use this code to let Googlebot know that a page or site has permanently moved to a new location.302 (Moved temporarily) The server is currently responding to the request with a page from a different location, but the requestor should continue to use the original location for future requests. This code is similar to a 301 in that for a GET or HEAD request, it automatically forwards the requestor to a different location, but you shouldn’t use it to tell the Googlebot that a page or site has moved because Googlebot will continue to crawl and index the original location.
303 (See other location) The server returns this code when the requestor should make a separate GET request to a different location to retrieve the response. For all requests other than a HEAD request, the server automatically forwards to the other location.
304 (Not modified) The requested page hasn’t been modified since the last request. When the server returns this response, it doesn’t return the contents of the page.You should configure your server to return this response (called the If-Modified-Since HTTP header) when a page hasn’t changed since the last time the requestor asked for it. This saves you bandwidth and overhead because your server can tell Googlebot that a page hasn’t changed since the last time it was crawled.
305 (Use proxy) The requestor can only access the requested page using a proxy. When the server returns this response, it also indicates the proxy that the requestor should use.
307 (Temporary redirect) The server is currently responding to the request with a page from a different location, but the requestor should continue to use the original location for future requests. This code is similar to a 301 in that for a GET or HEAD request, it automatically forwards the requestor to a different location, but you shouldn’t use it to tell the Googlebot that a page or site has moved because Googlebot will continue to crawl and index the original location.
4xx (Request error)
These status codes indicate that there was likely an error in the request which prevented the server from being able to process it.
400 (Bad request) The server didn’t understand the syntax of the request.
401 (Not authorized) The request requires authentication. The server might return this response for a page behind a login.
403 (Forbidden) The server is refusing the request. If you see that Googlebot received this status code when trying to crawl valid pages of your site (you can see this on the Crawl Errors page under Healthin Google Webmaster Tools), it’s possible that your server or host is blocking Googlebot’s access.
404 (Not found) The server can’t find the requested page. For instance, the server often returns this code if the request is for a page that doesn’t exist on the server.If you don’t have a robots.txt file on your site and see this status on the Blocked URLs pagein Google Webmaster Tools, this is the correct status. However, if you do have a robots.txt file and you see this status, then your robots.txt file may be named incorrectly or in the wrong location. (It should be at the top-level of the domain and named robots.txt.)If you see this status for URLs that Googlebot tried to crawl, then Googlebot likely followed an invalid link from another page (either an old link or a mistyped one).
405 (Method not allowed) The method specified in the request is not allowed.
406 (Not acceptable) The requested page can’t respond with the content characteristics requested.
407 (Proxy authentication required) This status code is similar 401 (Not authorized); but specifies that the requestor has to authenticate using a proxy. When the server returns this response, it also indicates the proxy that the requestor should use.
408 (Request timeout) The server timed out waiting for the request.
409 (Conflict) The server encountered a conflict fulfilling the request. The server must include information about the conflict in the response. The server might return this code in response to a PUT request that conflicts with an earlier request, along with a list of differences between the requests.
410 (Gone) The server returns this response when the requested resource has been permanently removed. It is similar to a 404 (Not found) code, but is sometimes used in the place of a 404 for resources that used to exist but no longer do. If the resource has permanently moved, you should use a 301 to specify the resource’s new location.
411 (Length required) The server won’t accept the request without a valid Content-Length header field.
412 (Precondition failed) The server doesn’t meet one of the preconditions that the requestor put on the request.
413 (Request entity too large) The server can’t process the request because it is too large for the server to handle.
414 (Requested URI is too long) The requested URI (typically, a URL) is too long for the server to process.
415 (Unsupported media type) The request is in a format not support by the requested page.
416 (Requested range not satisfiable) The server returns this status code if the request is for a range not available for the page.
417 (Expectation failed) The server can’t meet the requirements of the Expect request-header field.
5xx (Server error)
These status codes indicate that the server had an internal error when trying to process the request. These errors tend to be with the server itself, not with the request.
500 (Internal server error) The server encountered an error and can’t fulfill the request.
501 (Not implemented) The server doesn’t have the functionality to fulfill the request. For instance, the server might return this code when it doesn’t recognize the request method.
502 (Bad gateway) The server was acting as a gateway or proxy and received an invalid response from the upstream server.
503 (Service unavailable) The server is currently unavailable (because it is overloaded or down for maintenance). Generally, this is a temporary state.
504 (Gateway timeout) The server was acting as a gateway or proxy and didn’t receive a timely request from the upstream server.
505 (HTTP version not supported) The server doesn’t support the HTTP protocol version used in the request.
This might be helpful in case you are maintaining Windows server and need to find out whether your MsSQL and MySQL is applicable for patches or fixes from vendors, because sometimes Windows not displaying the exact version until application minor number.
To check Microsoft SQL/mssql version:
SELECT SERVERPROPERTY(‘productversion’), SERVERPROPERTY
(‘productlevel’), SERVERPROPERTY (‘edition’)
To check mysqld server:
SHOW VARIABLES LIKE “%version%”;
Today i found this message in one of my server, although the server’s load is quite low. using dmesg , i kept getting this, and it kept coming
ip_conntrack: table full, dropping packet
I’d seen this message before, but I headed over to Red Hat’s site for more details. Generally, the ip_conntrack_max is set to the total MB of RAM installed multiplied by 16. However, this server had 4GB of RAM, but ip_conntrack_max was set to 65536:
# cat /proc/sys/net/ipv4/ip_conntrack_max
65536
If you want to check your server’s current tracked connections, just run the following:
# cat /proc/sys/net/ipv4/netfilter/ip_conntrack_count
If you want to adjust it, just run the following as root:
# echo 131072 > /proc/sys/net/ipv4/ip_conntrack_max
If you want to find out how many sessions are open right now:
# wc -l /proc/net/ip_conntrack
——————-
Reducing(Offline)::
——————-
Scenario:
-There is existing LVM partition 50GB in total and has been used up 5GB
-We will reduce the LVM partition from 50GB to 10GB
-We need to unmount the FS before we can proceed
-Please do proper backup before proceed as there might be chances that you would lose your data
Output from df -h /media/data:
Filesystem Size Used Avail Use% Mounted on
/dev/mapper/vgdata-lvdata 50G 5.0G 42G 11% /media/data
Example current usage taken from df -h is 5G and wanted to be shrunk to 10G
# umount /dev/vgdata/lvdata
# e2fsck -f /dev/vgdata/lvdata
# resize2fs /dev/vgdata/lvdata 8G
# e2fsck -f /dev/vgdata/lvdata
# lvreduce -L 10G /dev/vgdata/lvdata
# e2fsck -f /dev/vgdata/lvdata
# resize2fs /dev/vgdata/lvdata
# e2fsck -f /dev/vgdata/lvdata
# mount -a
——————-
Increasing(online)::
——————-
Scenario:
-We would like to increase /add in another 5GB to /dev/vgdata/lvdata
lvextend -L +5G /dev/vgdata/lvdata
resize2fs /dev/vgdata/lvdata
There are some of software that can be used to increase/expand size of the boot or system disk size on Windows 2003 for example, acronis disk director, partition master, partition wizard, partition assistant,but whatever tools you will use, Please do a backup first. Please take note that you would not be able to increase/expand the size of the partition if there is no more available unallocated space on your Disk.
but why need to extend system or boot partition? As applications continue to be installed into the Windows system, one day, suddenly you will find that the system and/or boot partition do not have enough free disk space, and when every time the system starts, Windows always prompts the following information:
You are running out of disk space on SYSTEM (C:), To free space on this drive by deleting old or unnecessary files, click here…
This time i will use Gparted (http://gparted.sourceforge.net) , one of best opensource tools available, With GParted you can resize, copy, and move partitions without data loss (**Again i warn you to do a proper backup before proceed**)
-)Load in the Gparted live CD into the CdRom/DVDRom and boot up directly using CDRom/DVDRom, you might need to change your server/pc boot order
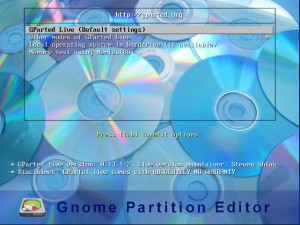
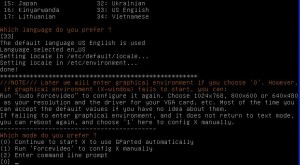
Select Gparted Live and press Enter to continue.
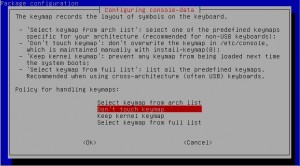
Use default setting and press enter to continue.
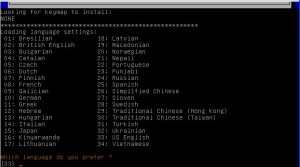
Use default setting to use US-English and press Enter to continue.
Use default setting and press Enter to continue.
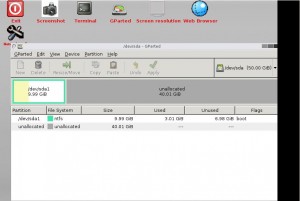
Select which partition you want to increase/expand.
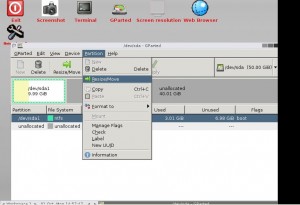
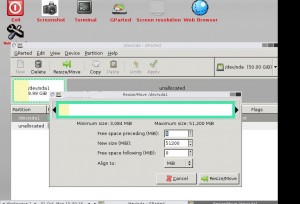
Click on “Partition” from the Menu and Click on “Resize or Move”
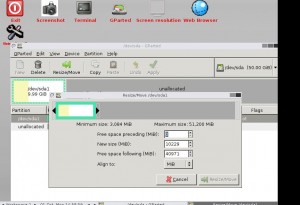
Before Rezising. Drag Bar accross to Max Size
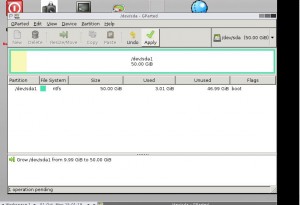
After Resizing.
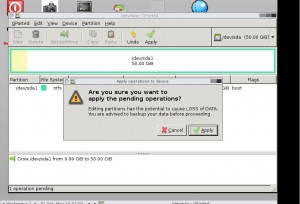
Click Apply.
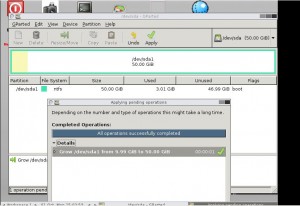
-)Done
PS. If your Windows 2003 is running on Virtualization (VMware ,VMware ESX/i, Virtualbox, KVM) , these steps can be followed:
-)Turn off Windows 2003 VM
-)Increase Disk Allocation to the VM for example from 100GB to 150GB
-)Turn on your Windows 2003 VM and boot using Gparted CD/ISO file
-)Follow the above steps before this “PS” section ![]()
[ Once Again , do this on your own risk, do backup first before proceed.]
We can log all the DNS queries , type this single command (as root) on your DNS server (Bind)
————-
rndc querylog
————-
once this done, all DNS queries will be logged in /var/log/messages, the results will be similar to
Oct 24 03:01:43 ns1 named[30660]: client 200.23.242.196#35545: query: parentsascoaches.net IN MX
Oct 24 03:01:43 ns1 named[30660]: client 80.86.96.1#58395: query: mx1.clients.netdns.net IN A
Oct 24 03:01:43 ns1 named[30660]: client 195.175.39.118#60651: query: abs-pos.com IN MX
3 types of Ethernet Wiring Diagram
>Straight (for both ends)
1)white/orange
2)orange
3)white/green
4)blue
5)white/blue
6)green
7)white/brown
8)brown
>CrossOver, used for pc to pc connection, DTE to DTE devices, DCE to DCE devices
1)white/orange——–white/green
2)orange————–green
3)white/green———white/orange
4)blue—————-blue
5)white/blue———-white/blue
6)green—————orange
7)white/brown———white/brown
8)brown—————brown
>RollOver, (also known as Cisco console cable)is a type of null-modem cable that is most commonly used to connect a computer terminal to a router’s console port.you also need RJ-45-to-DB-9 Adapter
1)white/orange——–brown
2)orange————–white/brown
3)white/green———green
4)blue—————-white/blue
5)white/blue———-blue
6)green—————white/green
7)white/brown———orange
8)brown—————white/orange


